Tuesday, 29 January 2019

iPad mini 5 May Support the Smart Keyboard and Apple Pencil


The iPad Pro started out as the only tablet in Apple’s lineup that supports the Apple Pencil.

That changed with the launch of the standard iPad, though. The entry-level model also supports the Apple Pencil, while the new iPad Pro upgraded to the second-generation Apple Pencil. Now, a new rumor suggests Apple may extend Apple Pencil support to additional iPad models. Developer Steve Troughton-Smith took to Twitter to hypothesize that maybe, just maybe, the oft-rumored iPad mini 5 may support the Smart Keyboard and Apple Pencil.

Troughton-Smith points out that the model numbers J210/J211 and J217/J218 appear to support both Apple’s accessories. However, in a potentially interesting turn of events, he also suggests in the first tweet that it’s possible both tablet models (the new iPad mini 5 and the equally as often rumored new entry-level iPad with thinner bezels) don’t feature Touch ID or Face ID. Troughton-Smith adds that he finds it hard to believe Apple would ship either model without any sort of biometric security measure, though.


Steve Troughton-Smith

✔@stroughtonsmith

It's hard to glean much information about J210/J211, and J217/J218, the upcoming iPad models. It seems like both iPad sizes support a Smart Keyboard and Pencil, but it's possible that neither include Touch ID (nor Face ID). Hard to imagine Apple shipping sans TouchID unless for $

28

3:32 AM - Jan 30, 2019

Twitter Ads info and privacy

See Steve Troughton-Smith's other Tweets

As noted in the follow-up tweets, Troughton-Smith says that it’s looking more likely that Apple will indeed include Touch ID. That would line up with earlier rumors regarding both new tablets, as far as design is concerned. It’s expected that the iPad mini 5 will look quite a bit similar to the iPad mini 4, and that while the new entry-level iPad may reduce bezel size a bit, not nearly as much as the new iPad Pro.

So, we could see some exciting things out of the less expensive iPad models later this year. On a person note, an iPad mini with Smart Keyboard and Apple Pencil support –with updated hardware– sounds about perfect. Let’s just hope the price tag isn’t too high.

[via @stroughtonsmith]

Sponsor ads:

Gihosoft Free iPhone Data Recovery:iphonerecovery.com

Free iPhone Data Recovery Software for Windows/Mac

Recover up to 12+ types of files, including contacts, SMS, photos, WhatsApp, Viber, notes, etc.
Restore lost data from iOS devices directly or from iTunes and iCloud backup

Recover iPhone data lost due to iOS upgrade/jailbreak, accidental deletion, device lost or broken

Support all the latest iPhone, iPad and iPod Touch

Both Free and Pro version.

If you lost data after you updated to a new iPhone, you can always use Gihosoft iPhone Data Recovery to get the data back from the old iPhone or backup.

Top 10 Best FRP Bypass Tools to Bypass Google Account on Android Device 2019

Worth reading:download youtube 1080p

Jihosoft Android Data Recovery: the best Android Data Recovery software for Windows and Mac to recover deleted contacts, messages, photos, videos, WhatsApp and etc from Android


If you use android phones, please choose Gihosoft Android Data Recovery

Monday, 21 January 2019

2019 Chinese hackers successfully activate China Unicom eSIM on iPhone XS


CHINESE IPHONE XS CAN SUPPORT ESIM

According to Charger Lab, a Chinese hacking team has successfully activated a China Unicom eSIM. What’s not known is the method employed by hackers to hack into iPhone XS.

Furthermore, the name of the hacker or the hacking team behind this hack is still not in the public. But considering China’s stance on dissidents, it’s fairly easy to understand why hackers have decided to stay anonymous.

An iPhone device that can successfully connect to an unsupported carrier is indicative of eSIM functionality being built into even in unsupported models.

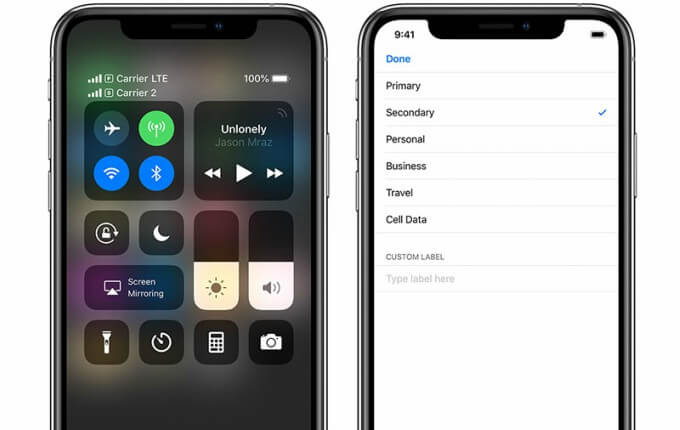
The image posted by Charger Lab on their Twitter account shows an iPhone XS. The primary carrier of the device is China Mobile whereas the secondary carrier is China Unicom (eSIM).


HACKERS USE DUAL SIM TRAY TO INSERT AN ESIM

For the uninitiated, Apple doesn’t sell eSIM-enabled iPhone models in China.

Out of all countries, only the United Kingdom, United States, India, and a few European countries currently allow users to avail the eSIM functionality, and that, too, on limited carriers.

In China and Hong Kong, iPhone XS, iPhone XS Max as well as iPhone XR come with a Dual SIM tray that allows the user to insert two nano-SIM cards.


To use China Unicom as the secondary network besides China Mobile, the hackers might have utilized the additional nano-SIM card slot to insert an eSIM.
OFFICIAL ESIM SUPPORT MIGHT BE IN THE WORKS

While end users won’t be getting this functionality anytime soon, official eSIM support in China could be in the works.

Both of the carriers in question are owned and operated by the Chinese state.

Ergo, we can expect official eSIM support on iPhone XS for China Unicom network along with other carriers. However, if that’s not the case, it’s highly unlikely we will ever see a similar third-party solution for the end user.

(Source – ChargerLAB)

Sponsor ads:

Gihosoft Free iPhone Data Recovery:https://www.gihosoft.com/iphone-data-recovery-free.html

Gihosoft iPhone Data Recovery Free

Free iPhone Data Recovery Software for Windows/Mac

Recover up to 12+ types of files, including contacts, SMS, photos, WhatsApp, Viber, notes, etc.

Restore lost data from iOS devices directly or from iTunes and iCloud backup

Recover iPhone data lost due to iOS upgrade/jailbreak, accidental deletion, device lost or broken

Support all the latest iPhone, iPad and iPod Touch

Both Free and Pro version.

If you lost data after you updated to a new iPhone, you can always use Gihosoft iPhone Data Recovery to get the data back from the old iPhone or backup.You may also like: iphonerecovery.com

If you use android phones, please choose Gihosoft Android Data Recovery.

With Gihosoft Android Data Recovery, no longer afraid of data loss!

Must read:Youtube video downloader for pc

Gihosoft RePicvid Free Photo Recovery Software provides a free photo recovery software for windows to help users recover the deleted or lost photo for free.

Jihosoft Android Data Recovery: the best Android Data Recovery software for Windows and Mac to recover deleted contacts, messages, photos, videos, WhatsApp and etc from Android devices.Tips:How to transfer messages from iPhone to iPhone


jihosoft Free iPhone Data Recovery

Thursday, 10 January 2019

How to Install Samsung Galaxy S9/S9+ Android Pie (One UI) Update


Samsung is now rolling out stable Android Pie-based One UI update for the Galaxy S9/S9+, much sooner than we expected. Here’s how you can download and manually install Samsung Galaxy S9/S9+ Android Pie update manually. This could be easily done by flashing the latest Android Pie firmware using Odin.


Android Pie is quickly getting released for several OEM devices. Samsung recently started beta testing for the Galaxy S9/S9+ and Note 9 via the official One UI Beta Program. Even the Galaxy S8 and Note 8 users have had the chance to install the One UI Beta build.


Also Read: 3 Methods to Update Android System Version


Android Pie update for the Galaxy S9/S9+ was expected to be rolled out in January 2019, but it seems Samsung has already released the update ahead of the planned schedule. The news broke in yesterday from SamMobile when two of their readers (one with Android Oreo and other with One UI beta installed) received the OTA notification of the Android Pie update.


The stable Android Pie-based One UI update comes with build number G960FXXU2CRLIand G965FXXU2CRLI for the Galaxy S9 and S9+, respectively. It has already started rolling out to the users in Europe, including Italy, Germany, and Switzerland. You can also force-check for the update by going to ‘Settings’ > ‘System Updates’.


Samsung data recovery


Since the update will be available gradually, it can take some time before it reaches each and every user. However, if you’re keen on getting your hands dirty, then you can follow the instructions below to manually install Samsung Galaxy S9/S9+ Android Pie Update. All you need to do is flash the available Android Pie-based One UI firmware using Odin. The method will work regardless if you have One UI Beta or latest Android Oreo firmware installed.


One UI Beta is available for:


One UI Beta for Samsung Galaxy Note 9 (OTA)


One UI Beta for Galaxy S8/S8+ (Snapdragon)


Contents [show]
Android Pie (One UI) Update for Samsung Galaxy S9/S9+ – Changelog


Samsung’s One UI on Galaxy S9/S9+ is definitely a big upgrade, not only does it brings Android Pie features to the device but also the complete overhaul of Samsung’s Android skin. The OTA update weighs 1744.24 MB, which is ordinary considering how massive the update is. It also carries the latest December 2018 security patches.


According to the release notes published by Samsung, the following is the full changelog for the Galaxy S9:


One UI


Content, settings, and other information have been reorganized to keep you focused on the task at hand.


Interactive elements have been moved to the bottom of the screen so they’re always within reach.


New designs and features such as Night mode help keep your eyes comfortable.


Notifications


You can reply to messages directly in the notification panel.


Image thumbnails are included in message notifications.


In an app’s notification settings, tap the switch once to turn on or off all the notifications in a category.


Samsung Keyboard


New Unicode 11.0 emojis are available.


New adaptive theme changes your keyboard look based on the colors of the surrounding app.


Floating keyboard is available in all apps and has a new size and transparency settings.


You can set a custom touch and hold delay.


Device care (formerly Device maintenance)


Performance modes are streamlined and integrated into power saving modes.


The Edge panel for device maintenance is discontinued.


Always On Display


New clock styles have been added, including the option to show a calendar with your schedule.


Charging information has been added to let you know how much time is remaining until fully charged.


You can show Always On Display whenever the screen is off, or you can set it to show for 30 seconds when you tap the screen.


Settings


Menus have been reorganized to make settings easier to find.


Samsung DeX


Continue using your phone while DeX is being displayed on a monitor or TV.Use Samsung DeX with supported HDMI adapters. No need for a DeX Station.


Bixby


Bixby is all new, with a range of improvements and new features.


Swipe left from the main Bixby screen to explore the latest features and supported apps.


You can control the Bixby key in settings to decide what happens when you press or double press.


Phone


You can now sort your call history by incoming and outgoing calls.


Your call history can include up to 2000 entries (increased from 500 entries).


Contacts


The new drawer menu makes it easier to manage contacts from various accounts.


Camera


The new Scene optimizer automatically enhances the camera’s color settings to fit the scene.


Gallery


Photo Editor Pro’s editing tools have been added to Gallery, so you can make all your edits and touchups without leaving the app.


My Files


The new storage analysis tool has been added to help you monitor your storage usage and save space.


You can now show or hide items on the My Files Home screen.


Samsung Health


Your daily step count will be shown in the notification panel. To hide it, press and hold the notification, then turn off Current steps.


Other improvements and changes


Turn on the screen automatically whenever you pick up your phone using the Lift to wake feature.


Access Kids Home on the quick panel.


Call stickers has been discontinued.


HEIF images are now supported.


As you can see, the changelog is quite massive and brings a lot of major and minor changes to the OS. With One UI on Samsung Galaxy S9/S9+, the company is focusing highly on one-handed usage and dark mode across the complete interface. Always-On Display now has new clock styles and also supports the calendar info.


Likewise, there are several improvements and feature-additions to almost all sections of the software.
Prerequisites


The process below will not wipe any data. However, we still strongly recommend that you take a complete backup of all your data on the phone including the internal storage. You can also follow our Android backup guide for this purpose.


Charge your Galaxy S9/S9+ to a sufficient battery level. This shall help avoid any sudden shutdowns during the update process.


Make sure that you install Samsung USB drivers on your PC


Download Odin 3.13.1 zip package and extract it on the PC
Download Galaxy S9/S9+ Android Pie (One UI) Firmware


Samsung Galaxy S9 (G960F – Exynos): Download link


Samsung Galaxy S9+ (G965F – Exynos): Download link
How to Install Samsung Galaxy S9/S9+ Android Pie Update


Download Galaxy S9/S9+ Android Pie (One UI) firmware


Extract the downloaded firmware file on the PC


Power off your phone completely


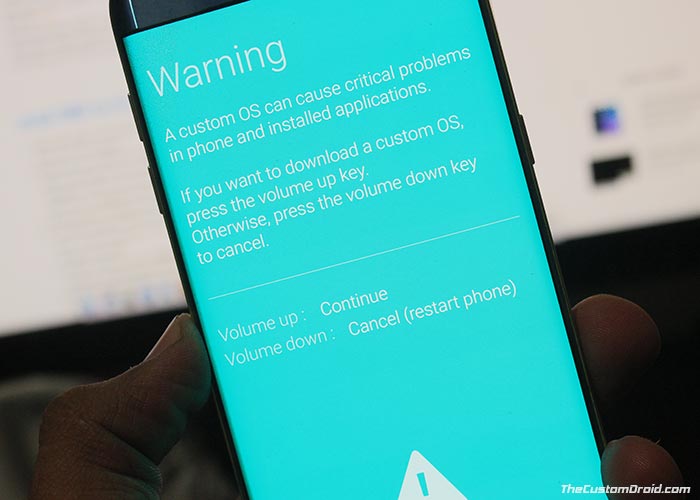
Hold the Volume Down, Bixby, and Power buttons together until you see the warning screen


On the warning screen, press the Volume Up button to enter Download Mode on your Galaxy S9/S9+


Connect your phone to the PC using the USB cable


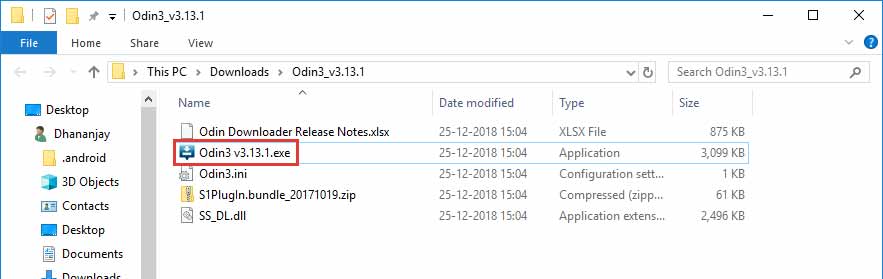
Open the folder where the Odin 3.13.1 zip file was extracted


Double-click on ‘Odin3 3.13.1.exe’ file to run the Odin tool


The ‘ID:COM’ port should light up ensuring that your phone is successfully detected by the tool


Now, click on the ‘BL’ button in Odin and select the firmware file starting with ‘BL_G960FXXU2CRLI’ for S9 and ‘BL_G965FXXU2CRLI’ for the S9+.


Do the same for ‘AP’, ‘CP’, and ‘CSC’ and select the corresponding firmware files.


In the case of ‘CSC’, make sure to select the ‘HOME_CSC’.


Once all the files have been selected, click on the ‘Options’ tab in Odin
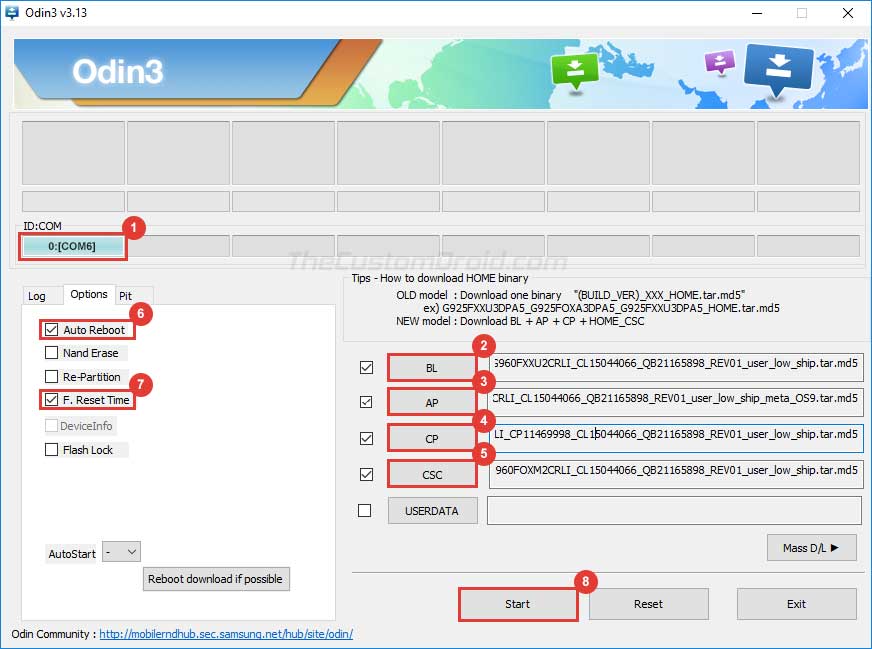


Make sure that ‘Auto Reboot’ and ‘F.Reset Time’ have been checked


Finally, click on the ‘Start’ button to install Samsung Galaxy S9/S9+ Android Pie Update


After the installation finishes, you shall see the ‘PASS!’ message in the Odin tool window and your Galaxy S9/S9+ should reboot into the updated OS.


Although not mandatory, we strongly recommend that you perform a factory reset from the stock recovery or via the device settings. This shall avoid any unexpected issues after upgrading. Note that factory resetting will wipe all your data including the internal storage.


So, you have just been able to download and install Samsung Galaxy S9/S9+ Android Pie (One UI) update. If you have any questions regarding the process, make sure to drop a comment below.

Wednesday, 26 December 2018

Download Sileo Cydia alternative for iOS 11.0-11.4 Beta 3


WHAT’S SILEO?

Sileo is a modern alternative to Cydia – the stock jailbreak package manager. It is developed by Coolstar and Nullpixel, the leading members of the Electra development team.

Beginning with iOS 11, Sileo is all set to completely replace the aging installer by Saurik with a fast and lightweight installer. Here’s a quick rundown of its features and functions –


It loads tweaks and packages at blazing fast speeds.


It also trims a lot of fat from the “Sources” section with the all-new “repo unclutterer” that refreshes sources almost instantly.


A clean, flat user interface that has the same look and feel as that of the stock App Store app.


Before you install this new Cydia replacement on your device, here are a few things you should keep in mind –


Some functionality and features are still missing or may not work as expected.


Since this is a beta preview, some bugs might have crept in.


Only payments through the Dynastic Development repository are supported for now.
WHICH FIRMWARE VERSIONS ARE COMPATIBLE?


11.0


11.0.1


11.0.2


11.0.3


11.1


11.1.1


11.1.2


11.2


11.2.1


11.2.2


11.2.5


11.2.6


11.3


11.3.1


11.4 Beta 1,2, and 3
DOES SILEO WORK WITH IOS 12/12.1 OR ABOVE?

Unfortunately, it doesn’t work with iOS 12, 12.0.1, 12.1 or higher versions. For those of you who don’t know, jailbreak package manager requires root access to function.

Since iOS 12 and above versions do not have a public jailbreak available, Sileo can’t work on them. Several disreputable individuals are pushing bogus and virus-laden versions of both Sileo and Cydia on websites like YouTube.


If you wish to run Sileo on your iOS 12 device, your best bet is to bookmark this page and keep a tab on the compatibility section above.
REQUIREMENTS


iPhone, iPad or iPod touch


A compatible firmware version


Electra jailbreak v1.1.0
HOW TO DOWNLOAD AND INSTALL SILEO ON IOS 11.0-11.3.1-11.4 BETA 3
ELECTRA JAILBREAK

Step 1 Open Cydia.

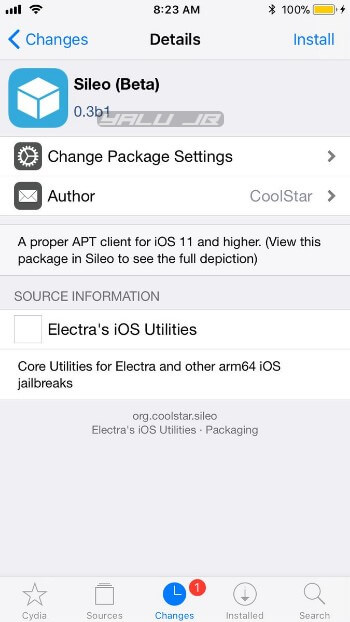
Step 2 Go to the Sources section, scroll down, and tap on Electra’s iOS Utilitiessource – the default repository of Electra jailbreak.

Step 3 Scroll down and tap on the Sileo (Beta) package and press Install.


Step 4 Wait for the installation to complete and tap Restart SpringBoard.

Step 5 Go back to your home screen and launch the Sileo app.


So how do you like this new Cydia alternative by Coolstar? Leave your comments below.
UNC0VER JAILBREAK

As of right now, unc0ver jailbreak is currently incompatible because it is designed primarily for Electra users. In spite of that, the developer team of unc0ver jailbreak is working on a new patch that will hopefully be released soon.

Warning – There’s a Debian package of Sileo floating around on Twitter. Although this package is legitimate, it can conflict with your setup and brick Cydia. If you are able to access Cydia, uninstall it as soon as possible.

Update – You can now safely install Sileo on unc0ver.

Step 1 Open Cydia.

Step 2 Go to Sources tab. Tap Edit > Add and enter the URL of PixelOmer’s repository – http://www.pixelomer.com/repo

Step 3 Now go to the Search tab and enter “Sileo Installer”. What this package does it, it lets you use Cydia along with Sileo without any issues.

Step 4 Tap Install to install the package from its official repository. Press Confirm and wait for the installation to commence.

Step 5 Once the installation finishes, tap Restart SpringBoard.

Step 6 Go back to your home screen and run the all-new jailbreak package manager by Coolstar.
FUTURE UPDATES

The development team plans to introduce new features and support to their package manager. Here’s what you can expect from the upcoming versions of Sileo.


Payment support coming to Chariz (formerly HashBang repo).


Source code will be soon get published on GitHub.


The initial build will be distributed on a new Cydia repository.
Tips:
Restoring Lost Photos and Videos from iPhone

If you have deleted some of your pictures or videos from your gallery, then there is a straightforward way to Recover Deleted Files iPhone back.

After you delete the media files from your gallery, be it photos or videos, then you must know that iOS has a feature that the deleted media files doesn’t get deleted immediately, but it gets compiled to a temporary folder from where it gets deleted after 30 days. If you lost data after you updated to a new iPhone, you can always use Gihosoft iPhone Data Recovery to get the data back from the old iPhone or backup. Should you wish to recover these files, you must go to that “recently deleted” folder and retrieve these files before 30 days.

If you use android phones, please choose Gihosoft Android Data Recovery.

Worth reading:Best youtube downloader online download youtube 1080p

Tips:

How to transfer messages from iPhone to iPhone

Thursday, 29 November 2018

How to Reformat iPhone Using iTunes 2019


How to Reformat iPhone Using iTunes

Another solution to how to reformat iPhone is to using iTunes. It is sometimes important to format your iPhone for optimization purposes. If you want to format your iPhone using iTunes, you can follow these steps:

Step 1: Open iTunes and ensure you have the latest version on iTunes installed on your PC or Mac.

Step 2: With a USB cable, connect your iPhone to your computer (PC or Mac).

Step 3: Select your iPhone when the icon appears on the iTunes screen.

Step 4: Click on “Summary” then click “Restore iPhone”.

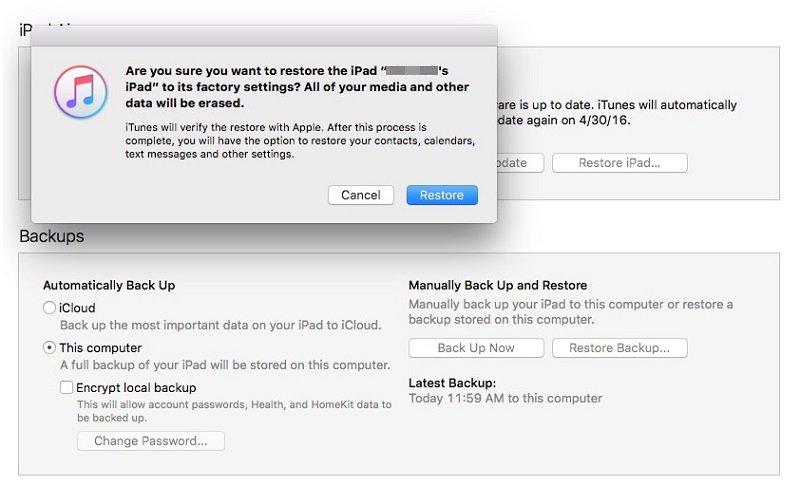
Step 5: Click on “Restore” on the confirmation screen.


Disadvantages:


This is the least recommended method due to its unfriendly user experience.


It has a lot of step to perform such a task and it may cause unknown errors.


The data erased by it can be recovered by other means too.

Sponsor ads:

Gihosoft Free iPhone Data Recovery:https://www.gihosoft.com/iphone-data-recovery-free.html

Gihosoft iPhone Data Recovery Free

Free iPhone Data Recovery Software for Windows/Mac

Recover up to 12+ types of files, including contacts, SMS, photos, WhatsApp, Viber, notes, etc.

Restore lost data from iOS devices directly or from iTunes and iCloud backup

Recover iPhone data lost due to iOS upgrade/jailbreak, accidental deletion, device lost or broken

Support all the latest iPhone, iPad and iPod Touch

Both Free and Pro version.

If you lost data after you updated to a new iPhone, you can always use Gihosoft iPhone Data Recovery to get the data back from the old iPhone or backup.You may also like: iphonerecovery.com

If you use android phones, please choose Gihosoft Android Data Recovery.

With Gihosoft Android Data Recovery, no longer afraid of data loss!


Worth reading:Best youtube downloader online download youtube 1080p


Friday, 9 November 2018

How To Recover Deleted Notifications On Your Android Phones 2019 New Guide


Learn how to recover deleted notifications on your Android phone: As we all know, Android’s notification shutter is awesome, as it gives a simple overview of everything arrived just now on your Smartphone. So today we are going to share the best method to get back your accidentally swiped notifications from your Android smartphone. Go through the post, to know about it.

Today billions of users are using Android devices, as it is the only platform that offers lots of features for their users. In Android when you get any notification it gets listed on the notification panel, and when we clear it, it permanently goes. However, sometimes we remove some of the relevant notifications that we might not want to delete. Therefore, we are here with the trick for How to Recover Deleted Notifications on your Android Phone. Yes, it is possible, you can recover notifications in your Android device by just following some of the simple steps that we have discussed in below method.

Also Read: How to Recover Deleted Files from Android

How to Recover Deleted Notifications on your Android Phone
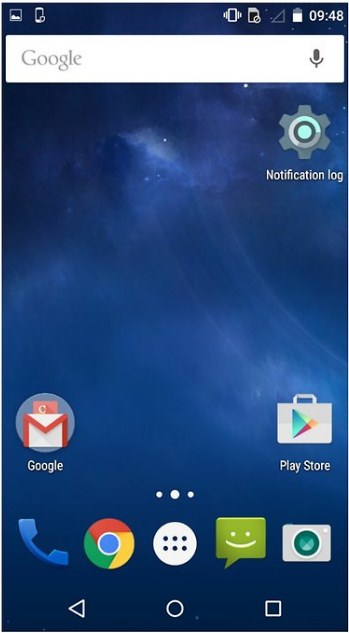
The method is very simple and straight and it doesn’t require any tool or app, you just need simple settings shortcut that you will fix in your home screen which in turn will display all the previous notifications of the day. Just follow the below steps to proceed.

Also Read: Top 5 Causes of Android Data Loss and How to Prevent It

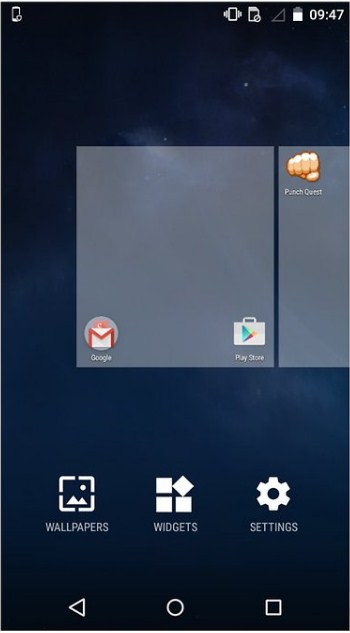
Step 1. First of all, long-press on a home screen of your Android device.

How to Recover Deleted Notifications on your Android Phone

Step 2. Now select widget option there and then swipe to left until you find “Settings” widgets. Tap on it and drop it on your home screen.

Step 3. Now option will appear to set the shortcut of any of settings, scroll down and select “notification log” there.


Extra Tips – Recover Lost Data from Android

Have you lost more than notifications? Files, messages, pictures … etc.

I recommend you to use Gihosoft Free Android Data Recovery Software that will help you recover all your data with a click of a button. It’s free to use and it’s the best of its kind. Enjoy recovering deleted files from Android by clicking the button below right now!

WindowsFree DownloadWin Version MacFree DownloadMac Version


How to Recover Deleted Notifications on your Android Phone
Step 4. Now the notification log will get set there on your home screen.

How to Recover Deleted Notifications on your Android Phone

Step 5. Now you can see all the notifications that you had already cleared.

How to Recover Deleted Notifications on your Android Phone


Also Read: How to Add a Windows-Like Recycle Bin to Your Android Phone

Notification log is not available on every Android version it is only available on Android 4.3 Jellybean or above. So, some of the users might not find Notification log in settings.
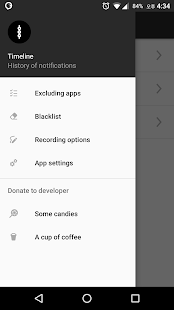
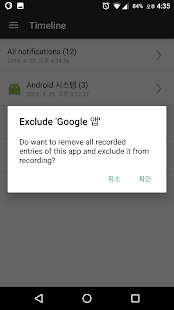
#Using Timeline-Notifications history
With this app, you can always see the history of notifications when you want. You can see which app had generated the notification and when it had been generated. Thus, you can easily recognize your past activities.

Step 1. You need to download and install Timeline-Notification history on your Android device.


DownloadQR-Code

Timeline - Record and check all notifications.

Developer: codococo

Price: Free+


Step 2. Now you need to grant Notification access rights for that simply tap on “OK” to continue

Timeline-Notifications history

Step 3. Now you need to enable “Timeline” on Notification access

Timeline-Notifications history

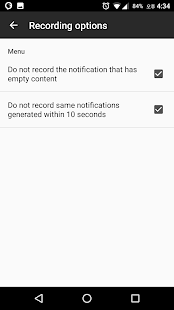
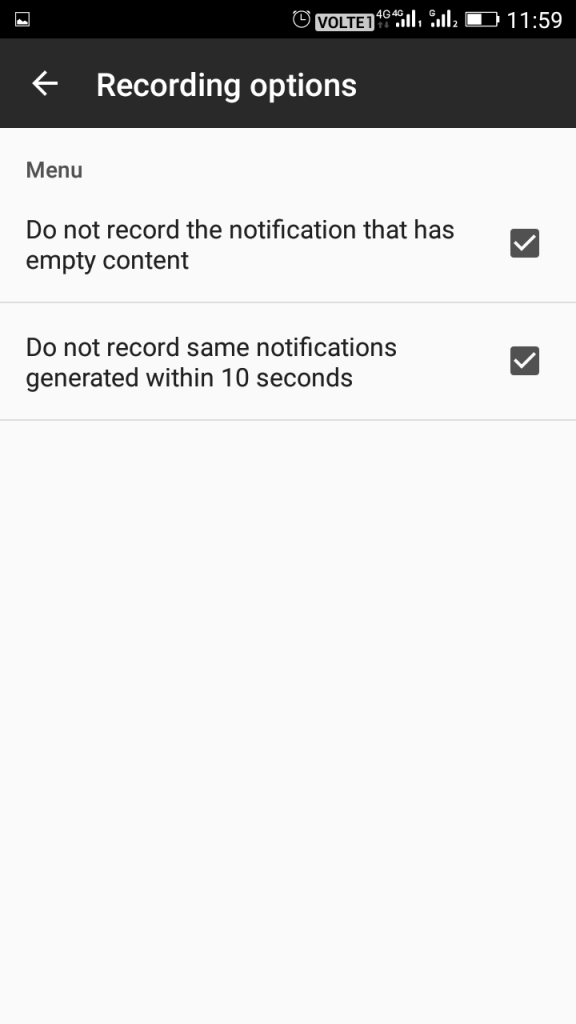
Step 4. Now open the recording option from the app and then enable the first two options.

Timeline-Notifications history

Step 5. Now each and every notification you will receive on your device will be shown on timeline app.

Timeline-Notifications history

It is the easiest way to record notification, this will help you to read all the notification that you have missed.

Also Read: How to Recover Deleted WhatsApp Messages on Android
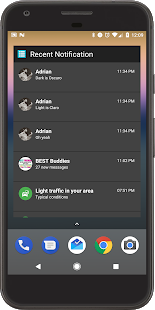
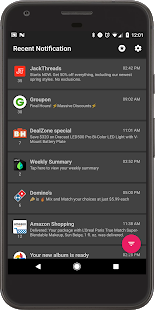
#Using Recent Notification

Have you ever missed an important notification shown in your device status bar? No worries! Recent Notification can safely store them for you. Relax and read them when you find time.

Step 1. First of all, download and install Recent Notification on your Android smartphone.


DownloadQR-Code

Recent Notification

Developer: LibApps

Price: Free+


Step 2. Now you will see the screen like below. Here you need to enable the Notification access. Simply, tap on Enable now to continue.

Using Recent Notification

Step 3. Now you will see the screen like below. Here you need to tap on the Setting button which is located on the top right side corner.

Using Recent Notification

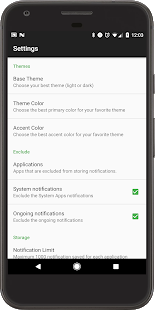
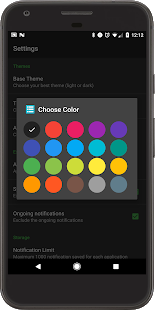
Step 4. Now you can alter any settings as per your wish. You can change the base theme, theme color and can even include & exclude apps.

Using Recent Notification

That’s it! You are done. Now, whenever your phone receives any notifications it will be saved on the Recent Notification app.

Using Recent Notification
#Using Notification History

Notification History is an Android app that records all the notifications of SMS, popped dialog, app installation and much more. This is one of the handy Android apps which you can use to read the deleted notifications.

Step 1. First of all, download and install Notification History app on your Android smartphone


DownloadQR-Code

Benachrichtigungsverlauf

Developer: Yotta Studio

Price: Free


Step 2. Launch the app, and you will see the screen like below. Here you need to enable the Accessibility Service and Notification Access.

Using Notification History

Step 3. Now open the settings panel of the app and set everything as per your wish.

Using Notification History

Step 4. Now move back to the main screen of the app and you will see all your notification history over there.

Using Notification History

That’s it, you are done! This is how you can use Notification history to recover/read deleted notifications.
Using Unnotification (Android Oreo)

Well, Unnotification is an Android app that works only with Android 8.0 Oreo operating system. So, if your devices are running Android Oreo, you can use the app to bring back deleted notification. Here’s how you can use Unnotification to bring back deleted notification.

Step 1. First of all, download & install Unnotification on your Android smartphone. You can get the download link from here.

Step 2. Now launch the app and grant the Notification access.

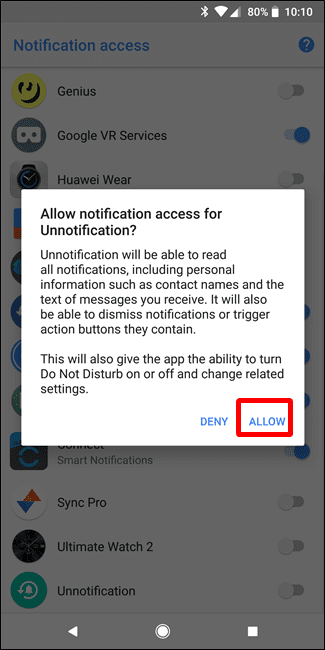
Image Source: howtogeek

Step 3. Now you will get a confirmation messages for allowing notification access. Simply, tap on ‘Allow’ to continue.

Image Source: howtogeek

Step 4. Once done, you will no see an Unnotification icon in the status bar. Now, whenever you will get a new notification, the app will ask you whether to undo that dismissal or not.

Step 5. The app will automatically get rid of the notification after 5 seconds. But, you can still access your notification by going through the app.

Step 6. Another interesting thing about Unnotification is that it allows users to blacklist apps that you don’t want unnotification to work with. However, if you blacklist any app, Unnotification will not save any further notification from the blocked app.

Image Source: howtogeek

That’s it, you are done! This is how you can use Unnotification to recover deleted Notifications on your Android.

So above is all about How to Recover Deleted Notifications on your Android Phone. By this method, you can now recheck any important notification that you have already cleared on your Android device. Hope you liked the article. Don’t forget to share it with your friends and leave a comment below if you need help at any step.


How to Fix iPadOS Password Not Recognised Error

Restore iPad using iTunes to Bring Your iPad to Normal (Device Must Be Sync with iTunes Before) Although, the previous procedure is effectiv...