Saturday, 16 June 2018

How to remove default Macintosh HD icon from the desktop on Mac

Here’s how to remove or hide the Macintosh HD icon from the desktop on your Mac running macOS High Sierra 10.13, macOS Sierra 10.12 or below.

When setting up your Mac or seeing around the desktop, you might have notice some folders, files and Macintosh HD icon. But except Mac’s default Macintosh HD icon, all the desktop items can be easily removed or deleted.

Removing the Macintosh HD icon from the desktop is not a big deal as I have a step by step guide for you to delete desktop’s Macintosh HD icon from mac.

How to Delete Macintosh HD icon from the desktop on Mac

It’s really simple to hide or delete Macintosh HD icon from your Mac desktop.

Step 1: From the top left corner Menu Bar, go to Finder
Step 2: Click on Preferences or hit the shortcut key (⌘ ,) from your Keyboard
Step 3: In the General tab, Under the list of labels uncheck the Hard disks box to hide Macintosh from the desktop on Mac.
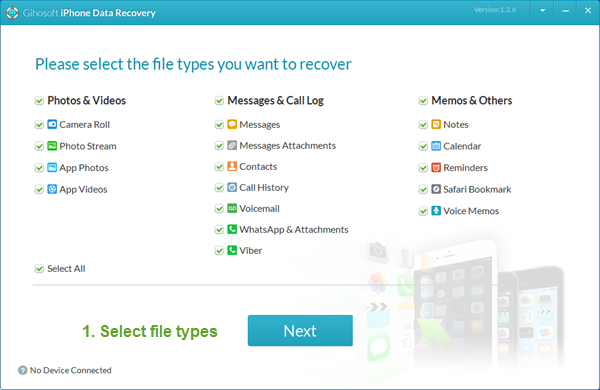
Gihosoft iPhone Data Recovery is a professional iPhone Data Recovery software to get back all your lost text message, photo, video, call history, note, contact and more from iPhone/iPad/iPod Touch. It offers a full solution to recover your lost data in different tough situations. Besides recovering data directly from iPhone, iPad and iPod touch, it also allows you to recover data from iCloud and iTunes backup files.

Also See:


Unable to share passwords with AirDrop in iOS 12 and macOS Mojave? Tips to solve the problem


Tips to solve the problem Unable to share passwords with AirDrop in iOS 12


Unable to share passwords with AirDrop in iOS 12 and macOS Mojave? Tips to solve the problem


Unable to share passwords with AirDrop in iOS 12 and macOS Mojave? Tips to solve the problem
Make sure AirDrop is turned on


The first thing to do is to make sure that AirDrop is enabled on your devices. In addition, make sure you have selected Everyone to be detectable by all compatible devices nearby


On your iPhone and iPad


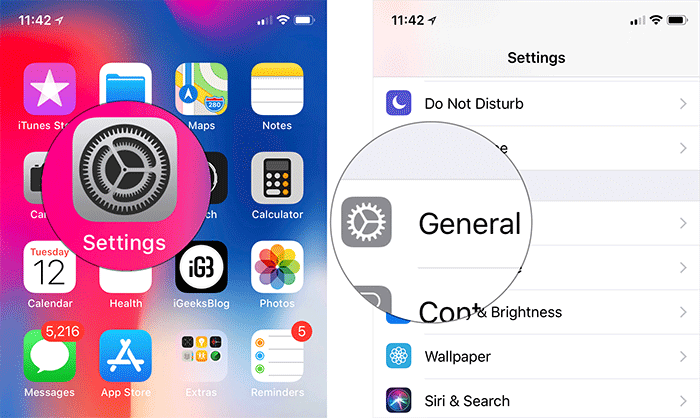
Step # 1. Open Settings app ⟶ Tap General.


Step # 2. Now tap AirDrop . Then, make sure that Everyone is selected


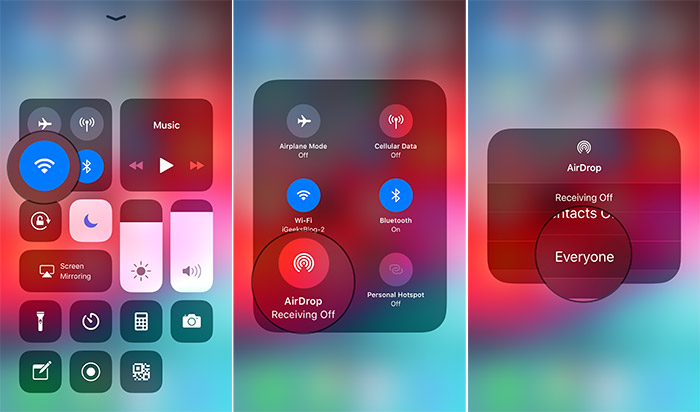
Alternatively, you can view the Control Center ⟶ touch and hold the Wi-Fi icon ⟶ AirDrop icon ⟶ and choose Everyone.


On Your Mac


Step # 1. Open Finder on your Mac.


Step # 2. Now click on Go to menu then click on AirDrop .


Step # 3. Then click on the drop down menu next to "Let me to be discovered by " then select Everybody


Be Sure …Gihosoft iPhone Data Recovery is a professional iPhone Data Recovery software to get back all your lost text message, photo, video, call history, note, contact and more from iPhone/iPad/iPod Touch. It offers a full solution to recover your lost data in different tough situations. Besides recovering data directly from iPhone, iPad and iPod touch, it also allows you to recover data from iCloud and iTunes backup files. Image result for gihosoft iphone


How to Put iPhone into DFU Mode – Quick Tip

How to Put iPhone into DFU Mode – Quick Tip


Before we start:


DFU mode wipes out all the existing data from your device. Therefore, you should always back up your device before moving ahead with the process.


You can’t put your device into DFU mode, if Find My iPhone is enabled. Hence, be sure to turn it off. Open Settings app → Apple ID banner → iCloud → Find My iPhone and turn it off.


Besides, make sure you have the latest version of iTunes installed on the computer.
How to Put iPhone or iPad into DFU Mode


Step #1. To get started, connect the iPhone to your computer and launch iTunes.


Step #2. Now, ensure that your device icon shows up in the top left menu.


Step #4. Now, you turn off your device. Press and hold the sleep/wake button and swipe to power off.


Note: On your iPhone X, iPhone 8/8 Plus, you need to press and hold the side button and volume up/down button and then slide to power off.


Now, enter DFU mode on your device. The process differs based on the device.


On iPhone X, iPhone 8/8 Plus: Press and hold the Side button for 3 seconds and then press and hold the volume down button while still holding down the side button. Make sure to keep holding both buttons for 10 seconds. Next, you need to release the Side Button but continue to hold the volume down button for about 5 seconds. If your iPhone screen remains black, it will have entered DFU mode.


iPhone 7 or 7 Plus: Just press and hold the sleep/wake button for 3 seconds. Then, you need to press and hold the volume down button while still holding the side button. After 10 seconds, you have to release the sleep/wake button make sure to continue to press the volume down button. Next, you have to wait for 5 more seconds and release the volume down button.


iPhone 6s or older: Just press and hold the home button and the sleep/wake button simultaneously. Then, you need to release the ON/OFF button after 10 seconds, however, make sure to keep holding the Home button. Then, you need to wait for about 10 seconds and then let go the Home button.


After you have entered DFU mode, iTunes will confirm that the device is in recovery mode. Click “OK.”
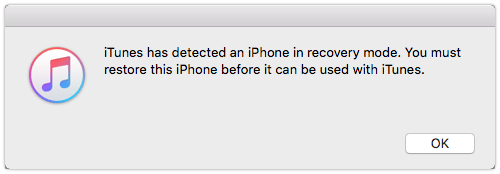

Important: If your iPhone screen remains black, it will have entered DFU mode. But if you see iTunes logo on the screen, it means you have gone wrong. Hence, you will have to repeat the steps all over again.


Then, you can go ahead with the task and downgrade or update the device based on your need.


After your iPhone has been successfully restored, it will get out of DFU mode automatically.


But what if someone has put your iPhone into DFU mode, how can you get your device out of it? It‘s easy to exit this mode. Keep reading…
How to Exit DFU Mode on iPhone X, iPhone 8/8 Plus


To exit DFU mode, all you need to do is restart the device by holding down the power button and volume down button until you see the Apple logo.
How to Exit DFU Mode on iPhone 7/7 Plus


On iPhone 7/7 Plus, you have to press the side button and volume down buttons at once to get out of DFU mode.
How to Get iPhone 6s or Earlier or iPad Out of DFU Mode


On your iPhone 6s or earlier or iPad, you need to press and hold Home and Power buttons for about 10-12 seconds.


Then, release the Home button but quickly press and hold the Power button until the Apple logo comes up on the screen.


Wrapping up


Have any question? Shoot it in the comments below. Once more, don’t fail to give a chance to DFU when everything else doesn’t seem to be fixing any persistent issue on your device.

Gihosoft iPhone Data Recovery is a professional iPhone Data Recovery software to get back all your lost text message, photo, video, call history, note, contact and more from iPhone/iPad/iPod Touch. It offers a full solution to recover your lost data in different tough situations. Besides recovering data directly from iPhone, iPad and iPod touch, it also allows you to recover data from iCloud and iTunes backup files.


Saturday, 9 June 2018

4 Solutions for iPhone Freezing after Screen Replacement


4 Solutions for iPhone Freezing after Screen Replacement


1. Check If There Is Any Other Hardware Problem


2. Force Reboot iPhone


3. Fix iPhone Freezing after Screen Replacement without Data Loss


4. Restore iPhone with iTunes using DFU Mode (Lose All Data))
1. Check If There Is Any Other Hardware Problem


First of all, when you find your iPhone freezing after screen replacement, it is a wise idea to take your device to the Apple Store and get it checked there. Some hardware problem is bothering perhaps. Therefore, it becomes necessary to let your device get inspected by the experts, since some hardware might not be installed well or has been affected during the screen replacement process, which causes the freezing problem. If the experts there say there's no problem with your hardware, then there might be software problem.


2. Force Reboot iPhone


To make your iPhone back to normal when it is freezing after screen replacement, a quick fix that can help you is to force reboot your device. You might have known about how to do this if you are an iOS device user. But if not, we will tell you how you can carry out this method. It is an elementary workaround that has the ability to fix majority of common iPhone issues in a couple of seconds. So, if your iPhone is not responding you back, here is what you should do.


iPhone 8/8 Plus/X users need to: Press the 'Volume Up' button and release it quickly. Subsequently press 'Volume Down' button and release quickly. Now, start pressing the 'Power' button until Apple logo on the screen becomes visible.You may also like:
Jihosoft iPhone Backup Extractor Extract and recover all types of data from iPhone backup files, such as camera roll photos, videos, SMS, contacts, reminders, WhatsApp, and etc.


iPhone 7/7 Plus users need to: Start pressing the 'Power' button and the 'Volume Down' buttons in unison. You need to keep holding the buttons for approximately 10 seconds and release them when you see Apple logo on your screen.Gihosoft iPhone Data Recovery https://goo.gl/LF7B13 Gihosoft iPhone Data Recovery is a professional iPhone Data Recovery software to get back all your lost text message, photo, video, call history, note, contact and more from iPhone/iPad/iPod Touch. It offers a full solution to recover your lost data in different tough situations. Besides recovering data directly from iPhone, iPad and iPod touch, it also allows you to recover data from iCloud and iTunes backup files. https://www.gihosoft.com/iphone-data-recovery-free.html


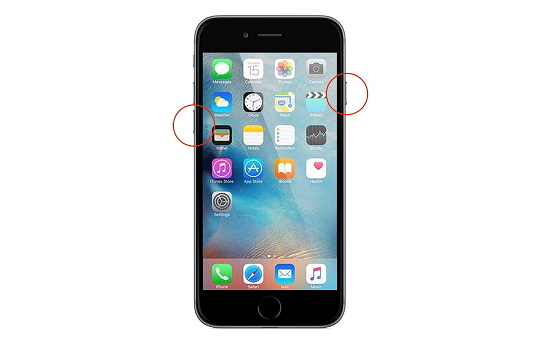
iPhone 6/6 Plus and earlier models' users need to: Press the 'Power' and the 'Home' buttons at the same time. Don't release the buttons until you catch sight of the Apple logo on your screen.


Now, this should solve your iPhone frozen problem after screen replacement issue but if it is still persisting, you should then proceed to the next solution.
If you lost videos from iOS Camerall Roll which are nowhere to download again, you can use Gihosoft iPhone Data Recovery to get back deleted videos from iOS device including iPhone, iPad and iPod Touch.

Sunday, 6 August 2017

How to fix iOS 10.2 Battery Draining Fast ?

Part 1: How to fix iOS 10.2 Battery Draining Fast

Step 1: First to check the battery usage. Go to settings – to check battery if there is an app that is the chief culprit. Then reboot your iPhone, here you need to hold down the wake/sleep button and home button until the Apple Logo appears.
Step 2: Reset all settings. Go to settings – General – Reset – Reset all settings to factory default.
Step 3: Enable Low power mode. Go to settings – Battery – Turn on low power mode.
Step 4: You can turn on airplane mode. Here you just need to enable airplane mode when you are not using the iPhone.
iphone-6s
Step 5: Try to turn off background app refresh. We all know when you turn on this feature, the app will work in the background and use the battery. So if you don’t need the apps refresh automatically, you can just Go to settings – General – Background App Refresh – Turn it off. That’s OK now.read more:mp3boo alternatives
Step 6: Please turn off location services. Just open settings app, go to privacy and location services, you can click turn it off. On the other way, you can also set it to enable the services while using the app.
Step 7: You can disable iCloud keychain. Simply go to settings, and then to iCloud, keychain just turn it off. Or you can downgrade to the old version.
Step 8: Restore your device. This step can erase all the settings and content on your device, so it is the last option.If you lost videos from iOS Camerall Roll which are nowhere to download again, you can use Gihosoft iPhone Data Recovery to get back deleted videos from iOS device including iPhone, iPad and iPod Touch.
Jihosoft iPhone Backup Extractor Extract and recover all types of data from iPhone backup files, such as camera roll photos, videos, SMS, contacts, reminders, WhatsApp, and etc.
Gihosoft Android data recovery Free is a super awesome software specialized in Android file recovery. With this program, you are able to recover deleted photos, music, videos, messages, contacts, call logs, WhatsApp messages, Viber chat history and more from Samsung, Huawei, LG, HTC, Motorola, Google, Oneplus, Sony, Lenovo, ZTE and other Android devices directly. Meanwhile, this Android data recovery software is available for both Windows and Mac platforms.

How to Fix iPadOS Password Not Recognised Error

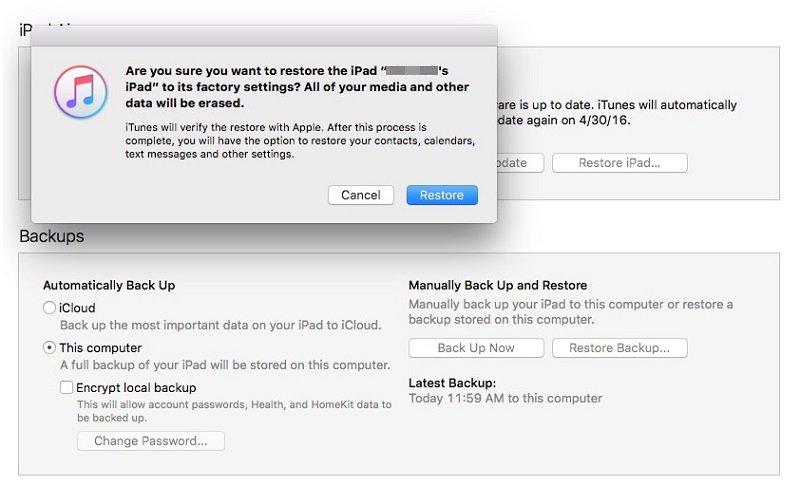
Restore iPad using iTunes to Bring Your iPad to Normal (Device Must Be Sync with iTunes Before) Although, the previous procedure is effectiv...