7 Best Running Apps For Android devices
Running is obviously one of the best ways to get into the shape. There are so many health benefits of running. It can strengthen muscles, improve cardiovascular fitness and also help you reduce weight. While other exercises may require equipment, running is simply one of the cheapest forms of exercise.
A lot of people search for a perfect gadget to track their running distance, running speed, and calories burned. So, let me remind you that the best gadget is something that you already have, a Smartphone. There are thousands of running apps available on Google Play Store for Android devices. All you need to do is to choose the best one out of thousands that suits your need.
In this article, I will share my picks for the Best running apps for Android. These Running Apps offer
GPS tracking and also allow you to share your running stats with your friends.
Worth Reading: 9 Best Calorie Counter Apps For Android To Track Your Diet
How to Find or Track a Lost or Stolen Android Phone Quickly
Here are the Best Running Apps For Android Devices:
Runtastic
Endomondo – Running & Walking
Runkeeper – GPS Track Run Walk
Strava Running and Cycling GPS
Google Fit
Pedometer, step counter & weight loss tracker App
Running Distance Tracker+
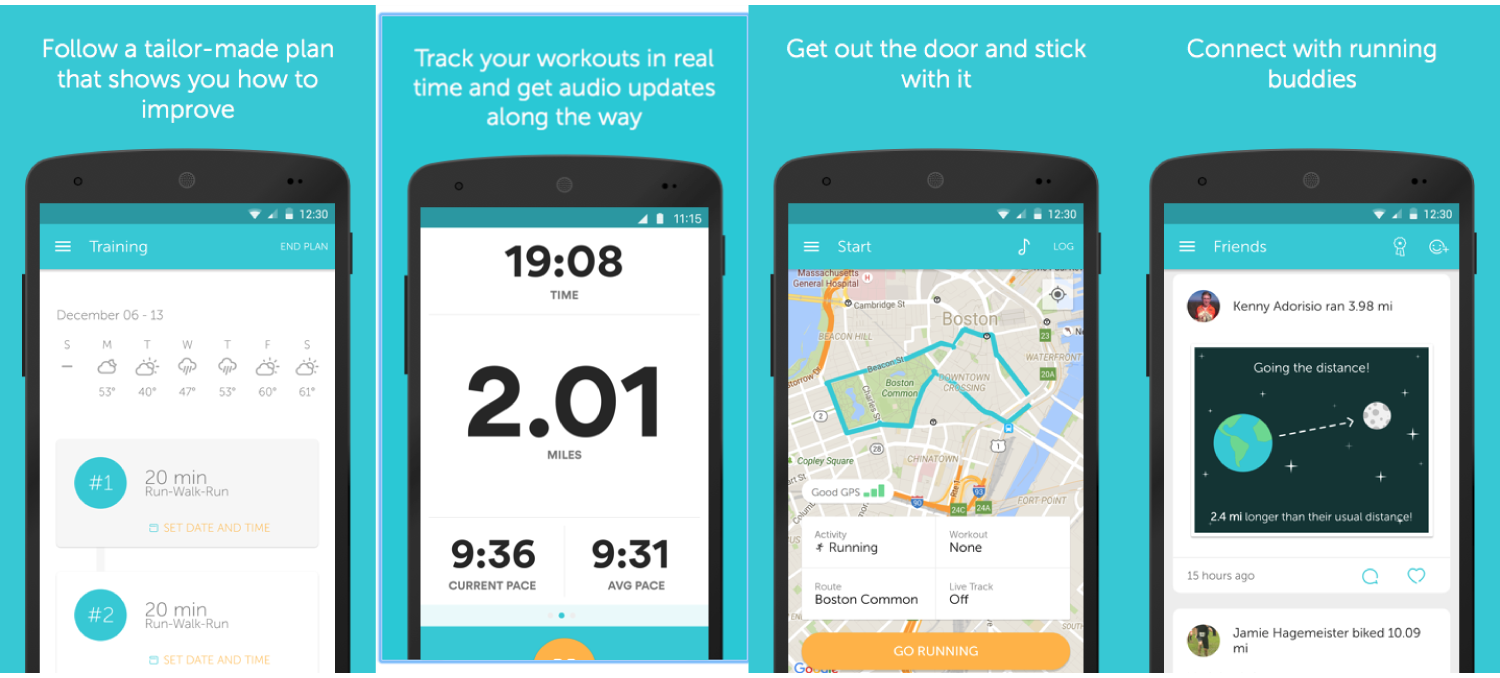
1. Runtastic
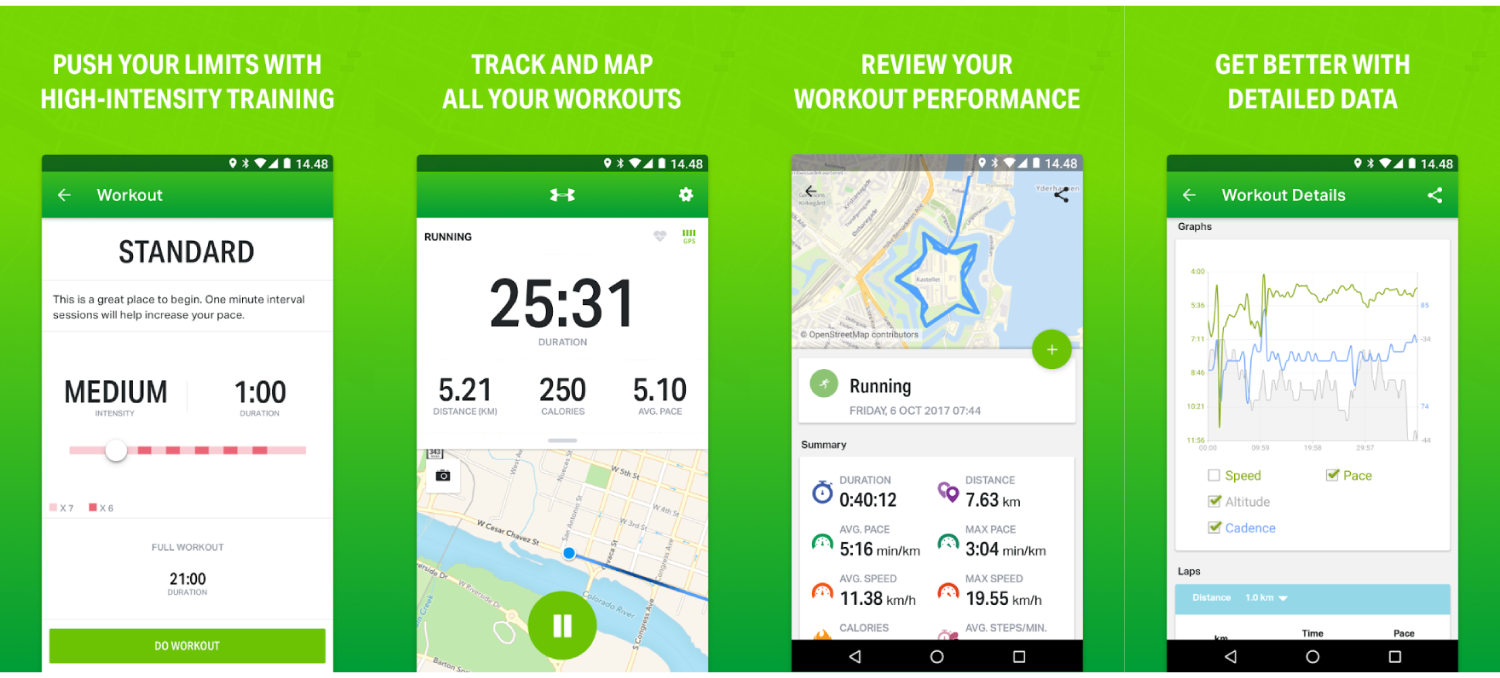
Runtastic is one of the most popular running apps with more than 10 Mn downloads on Play Store. This App not only tracks running but also helps you track other activities like jogging, biking & walking. You can easily connect this App with other Apps such as Google Fit &
MyFitnessPal. This Runner App has lots of unique features such as voice coach support, live tracking, support for different wearables, complete statistics, monthly workout tables and so on. All these advanced features make Runtastic suitable for beginners and veterans.

Highlights of “Runtastic”:
LIVE Tracking & Fitness Tracking (distance, time, speed, elevation, calories burned).
Voice Coach Support.
Android Wear Support.
Integrated music player.
Integration with Google Fit & MyFitnessPal.
Download
2. Endomondo – Running & Walking
Edmondo is one of the best running apps that is available on Google play store for free. With this app you can track 40+ activities including running, walking and cycling. This app is suitable for the people who are into different fitness activities. Know you running duration, speed, distance, calories burned, and more with this fitness app.
Highlights of “Endomondo”:
Track running, walking, cycling, and 40+ other activities using GPS.
Set a time, distance or calorie goal.
Connect with other fitness tracking apps like Google Fit and MyFitnessPal.
Use your favorite wearable devices(Android Wear, Garmin, Pebble, etc.).
Get Audio feedback.
Download
3. Runkeeper – GPS Track Run Walk
Runkeeper uses GPS of your phone to track running, walking, jogging, biking, or any other activity. The app has a simple and friendly interface which makes it really easy to use. Runkeeper offers many beneficial features that include exercise tracking, set goals, progress analysis, support for different wearables, audio cues, stopwatch mode, and social feactures.
Highlights of “Runkeeper”:
Track run, walk, jog, bike and more activities using phone’s GPS.
Create a custom challenge.
Spotify and other health apps like Fitbit, MyFitnessPal integration.
Bluetooth Connectivity, Wearables support.
Social Sharing.
Download
4. Strava Running and Cycling GPS
Strava is a powerful fitness app that helps you track running, cycling and swimming. You can also measure how much distance you have covered, your running speed, elevation gained and calories burned during every run. The app provides support for many wearables and integration with other apps.
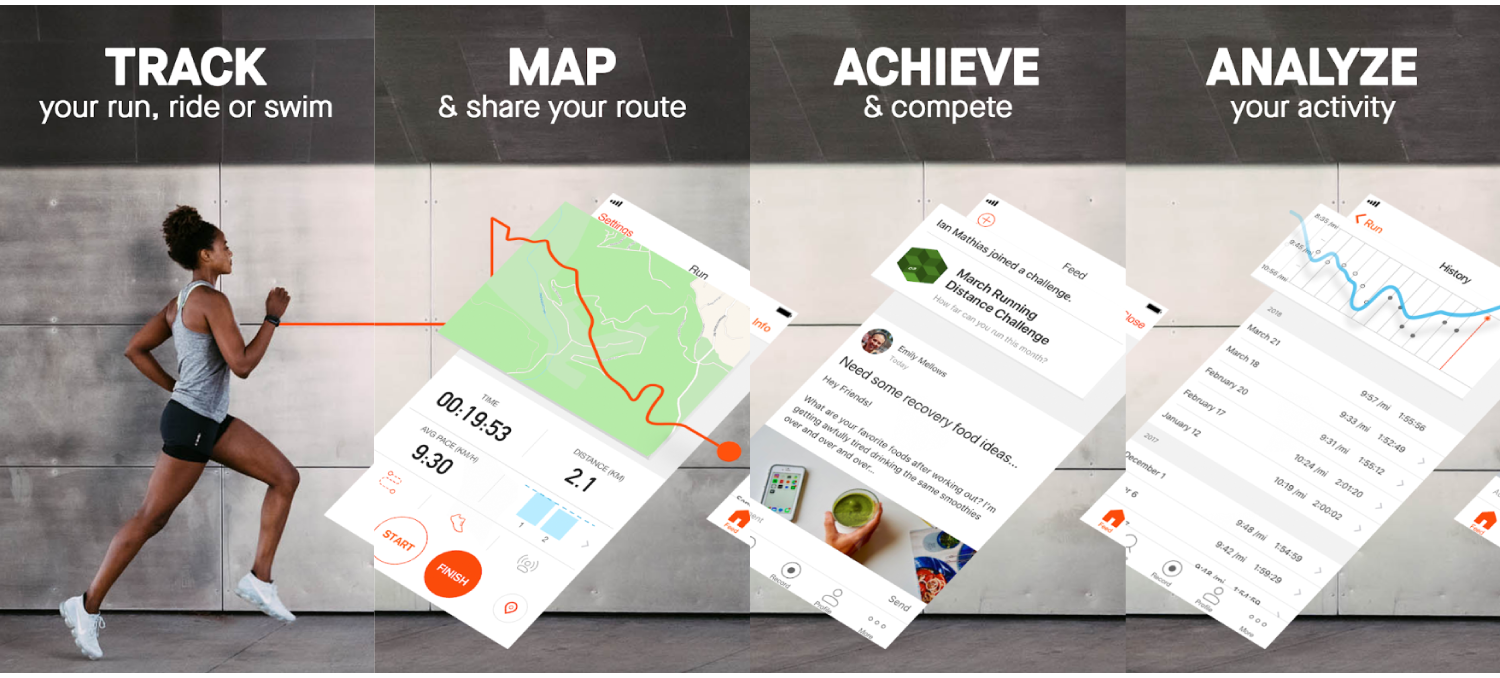
Highlights of “Strava”:
Track running, cycling, and swimming.
Measure distance, pace, speed, altitude gained and calories burned.
Monthly challenges.
Record routes.
Share the roadmap & photos of your latest bike drive with your friends.
Download
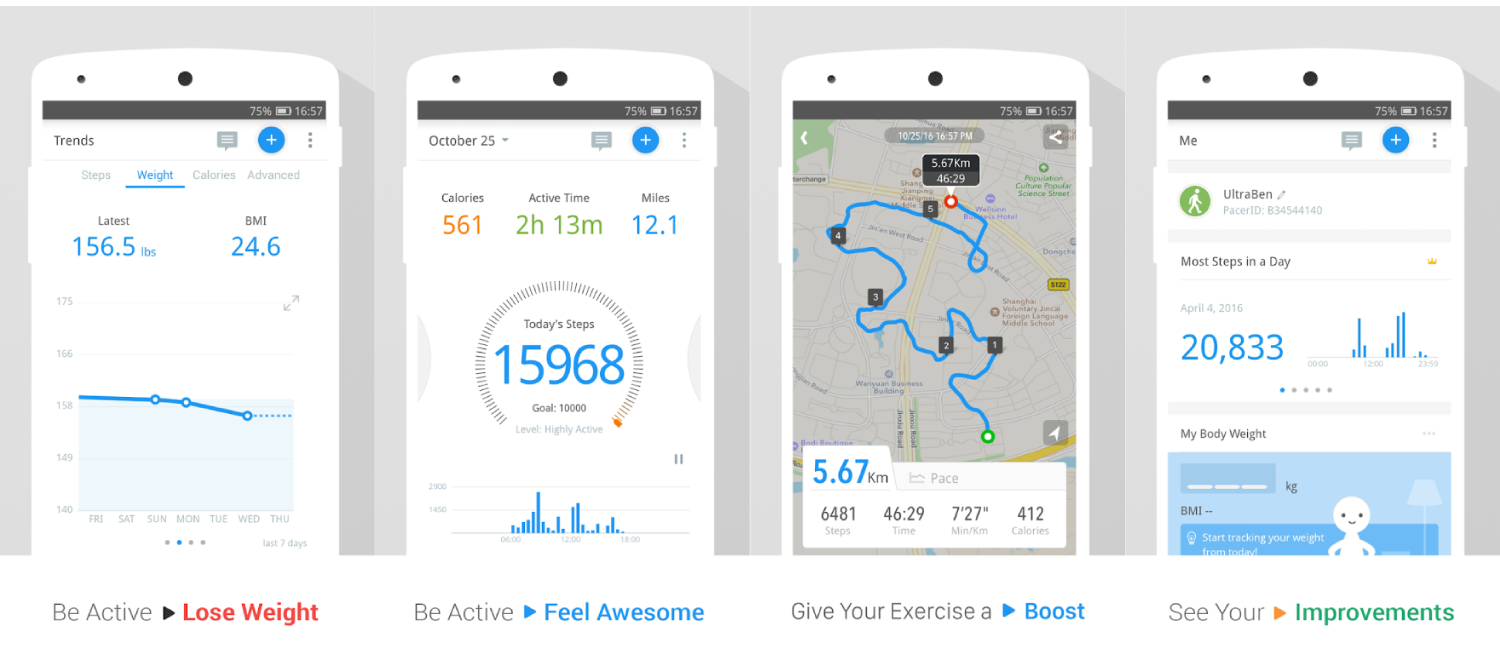
5. Google Fit
Google fit is one of the most reliable health & finess apps. It uses the in built sensors of your mobile phone to automatically track activities like walking, biking and running. The app provides realtime stats for your activities. It also supports most wearables that include Google, Nike+, Runkeeper, Strava, MyFitnessPal, Lifesum, Basis, Xiaomi Mi bands, etc.

Highlights of “Google Fit”:
Live stats for your runs, walks, and rides.
Set goals based on steps, time, distance, calories consumed.
Supports most of the wearables.
Measure your speed, pace, route, elevation, and more.
Recommendations and audio coaching for activity goals.
Download
6. Pedometer, step counter & weight loss tracker App
Pedometer is another great app that can help you track your step, walking & weight loss. This app also provides fitness plans and guides for losing weight & burning calories. You can pause step counter anytime you want. The pacer app comes with loads of customization options also adds support for other apps like MyFitnessPal and Fitbit. No need to walk alone when you can create walking groups with your friends & family.
Highlights of “Pedometer”:
Complete fitness & Steps tracking along with calories, distance and active time.
Sync activity data with MyFitnessPal and Fitbit.
Exercise plans for health goals.
Audio and Video guide support.
Pause/Resume step counter anytime.
Download
7. Running Distance Tracker+
Running Distance Tracker+ accurately tracks your distance, pace, calories burned and more. This is very simple yet powerful fitness tracker app. This app syncs your favorite music and also guides(audio) you as you run towords your desination point.

Highlights of “Running Distance Tracker+”:
Voice feedback.
Average & current pace tracking.
Calories burned.
Fitness & distance tracking.
Music sync option.
Download
Related Posts:
Top 10 Ad Blocker Apps for Android
10 Best Free Audio Players for Android in 2018
Top 10 Best Instagram Photo Downloader for Androids
Top 10 Best Free Android Photo Editors in 2018
Have we missed any great running apps for Android? If yes then tell us about them in the comment box.
Gihosoft Total Video Converter is a professional all-in-one video tool that enables you to convert videos and audios into various different formats. You can also download videos from YouTube or other online video sharing sites and convert them easily. Plus, you’re able to personalize your videos with its inbuilt editor, such as, trimming, cropping, applying video effects, adding watermark, subtitles, and more. If you need a powerful and professional desktop video converter program, just download Total Video Converter and follow the step-by-step guide here to have a try.